RV Replacement Battery Guide
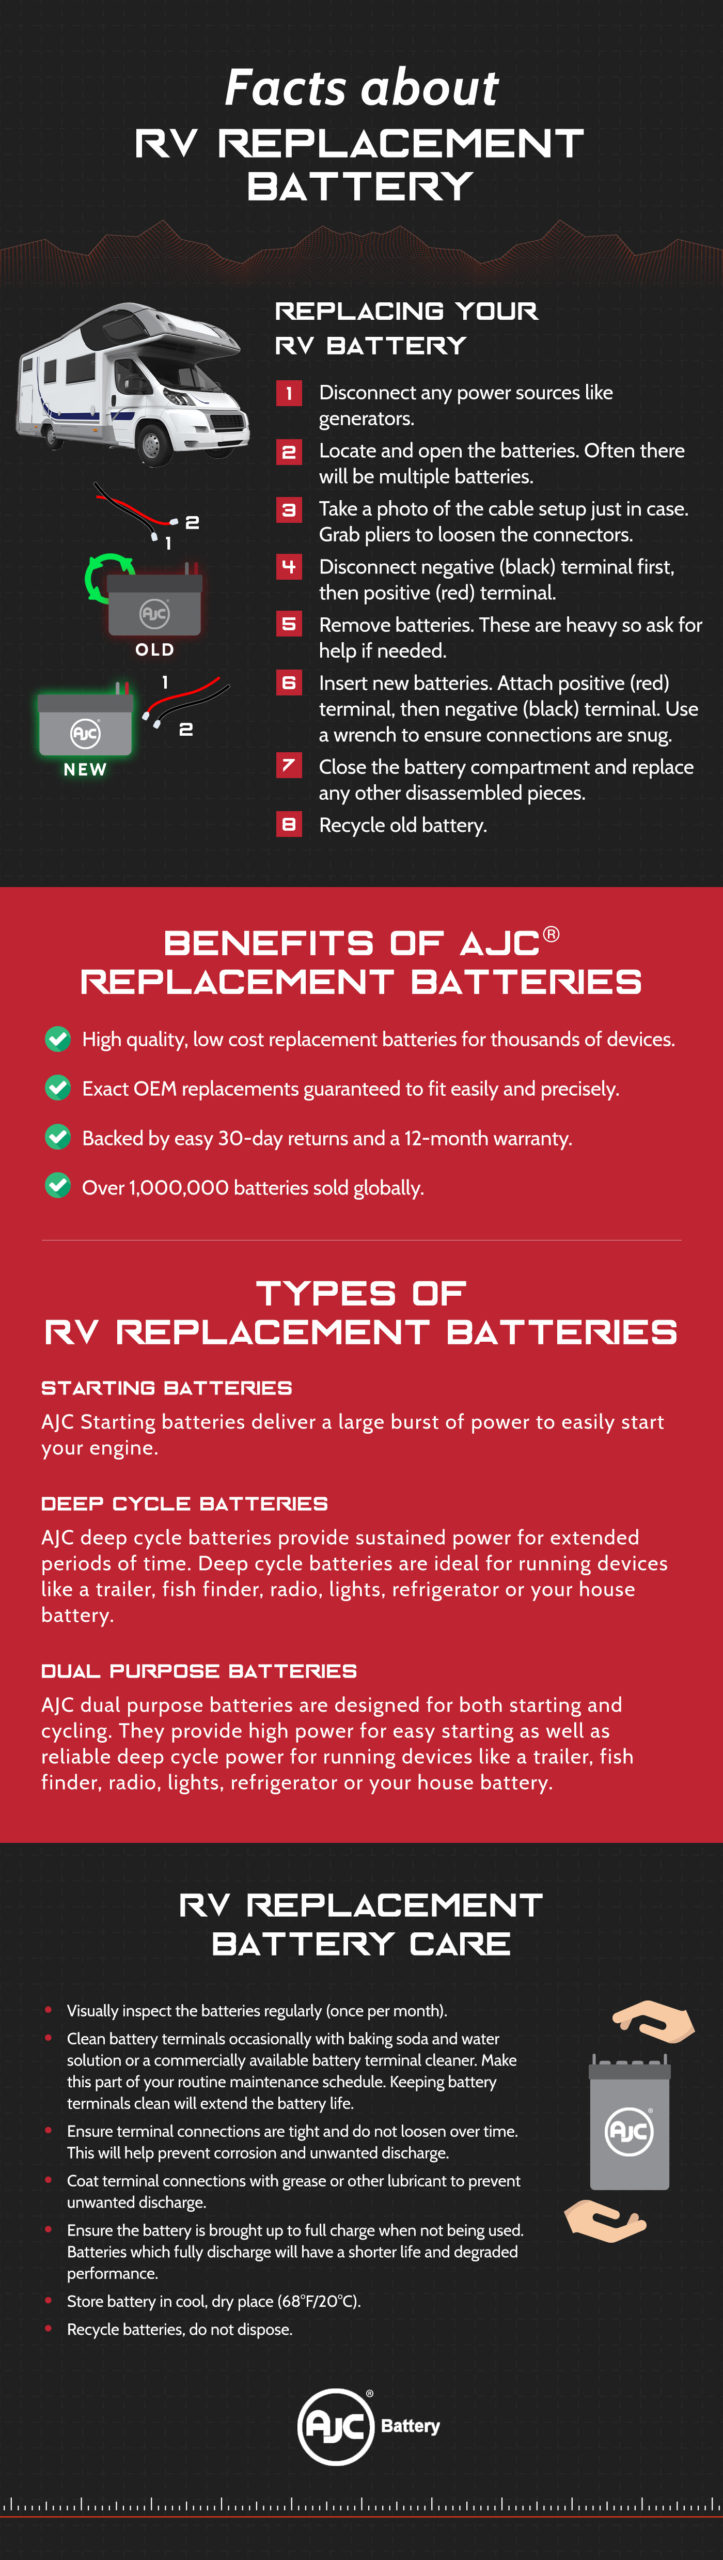
Replacing Your RV Battery
- Disconnect any power sources link generators.
- Locate and open the batteries. Often there will be multiple batteries.
- Take a photo of the cable setup just in case. Grab pliers to loosen the connectors.
- Disconnect negative (black) terminal first, then positive (red) terminal.
- Remove batteries. These are heavy so ask for help if needed.
- Insert new batteries. Attach positive (red) terminal, then negative (black) terminal. Use a wrench to ensure connections are snug.
- Close the battery compartment and replace any other disassembled pieces.
- Recycle old battery.
Benefit of AJC® Replacement Batteries
- High quality, low cost replacement batteries for thousands of devices.
- Exact OEM replacements guaranteed to fit easily and precisely.
- Backed by easy 30-day returns and a 12-month warranty.
- Over 1,000,000 batteries sold globally.
RV Battery Care
- Visually inspect the battery regularly (once per month).
- Clean battery terminals occasionally with baking soda and water solution or a commercially available battery terminal cleaner. Make this part of your routine maintenance schedule. Keeping battery terminals clean will extend the battery life.
- Ensure terminal connections are tight and do not loosen over time. This will help prevent corrosion and unwanted discharge.
- Coat terminal connections with grease or other lubricant to prevent unwanted discharge.
- Ensure the battery is brought up to full charge when not being used. Batteries which fully discharge will have a shorter life and degraded performance.
- Store battery in cool, dry place (68°F/20°C).
- Recycle batteries, do not dispose.
Browse our full collection of RV Replacement Batteries